关于 Umami
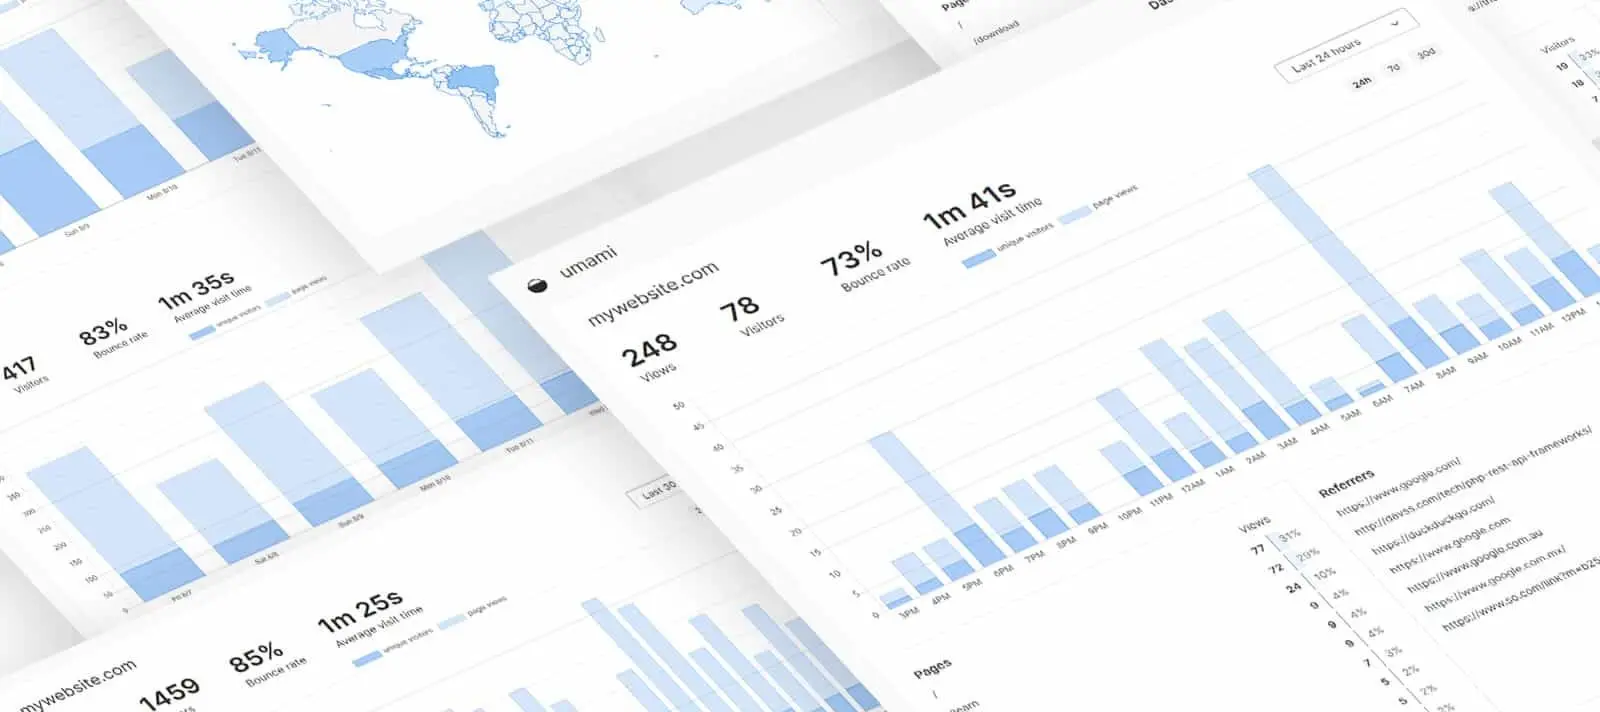
Umami 是一个开源的、以隐私为中心的 Google Analytics 替代方案。Umami 提供强大的网络分析解决方案,不会侵犯用户隐私。此外,当自行托管 Umami 时,可以完全控制自己的数据。
查看 Umami 功能示例:🔗Live Demo 。
如何搭建
本文使用 Serverless 平台来搭建 Umami,应用部署在 Netlify,数据库使用 Supabase,其他平台参见 官网文档
小声哔哔
官网个纯英文的太坑了
数据库
Supabase 是一个兼容 PostgreSQL 的无服务器数据库平台。
其他数据库参见官网文档 Hosting Managed databases 部分。
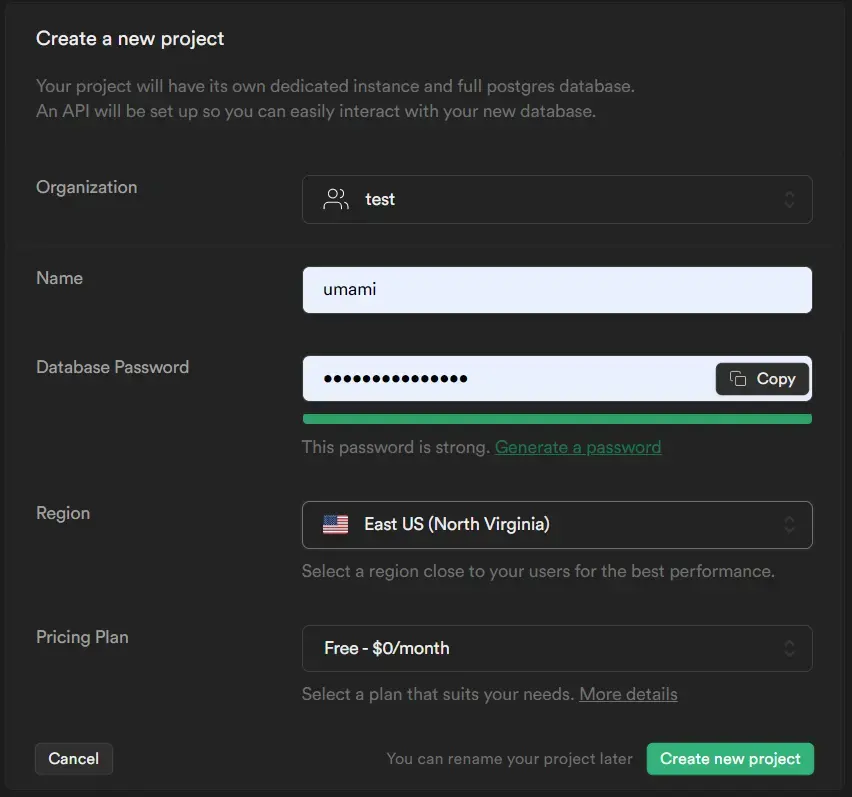
登录 Supabase 并创建一个数据库,名字假如为 umami 。注意,创建时会让你输入
Database Password,复制下来保存着,等下要用。Region指的是数据库地址,尽量选美国(US),因为离Netlify服务器比较近(猜的:D)
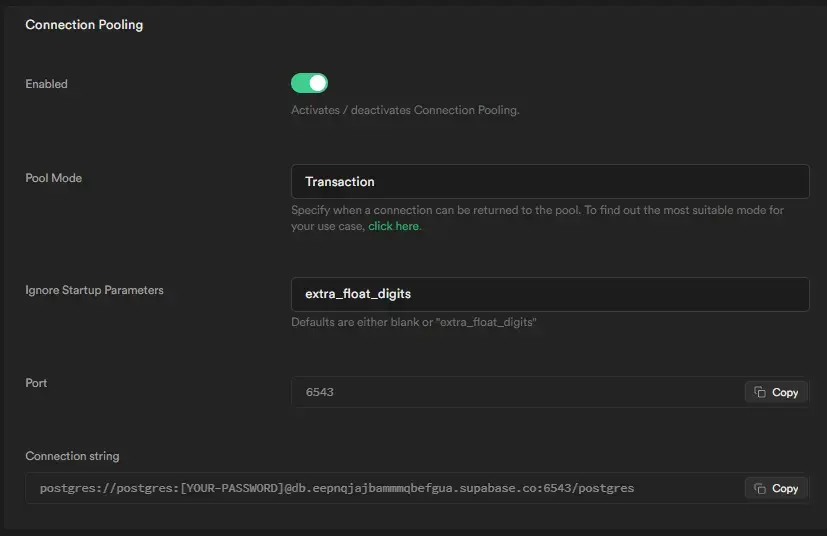
获取连接字符串(侧边栏
setting->Database->滑倒下面的Connection Pooling)->复制Connection String并把复制的
Database Password代替[YOUR-PASSWORD]注意:你需要在这段字符串后面增加一个
?pgbouncer=true现在你的
Connetion String应该类似于这样的postgres://postgres:[YOUR-PASSWORD]@db.eepnqjajbammmqbefgua.supabase.co:6543/postgres?pgbouncer=true

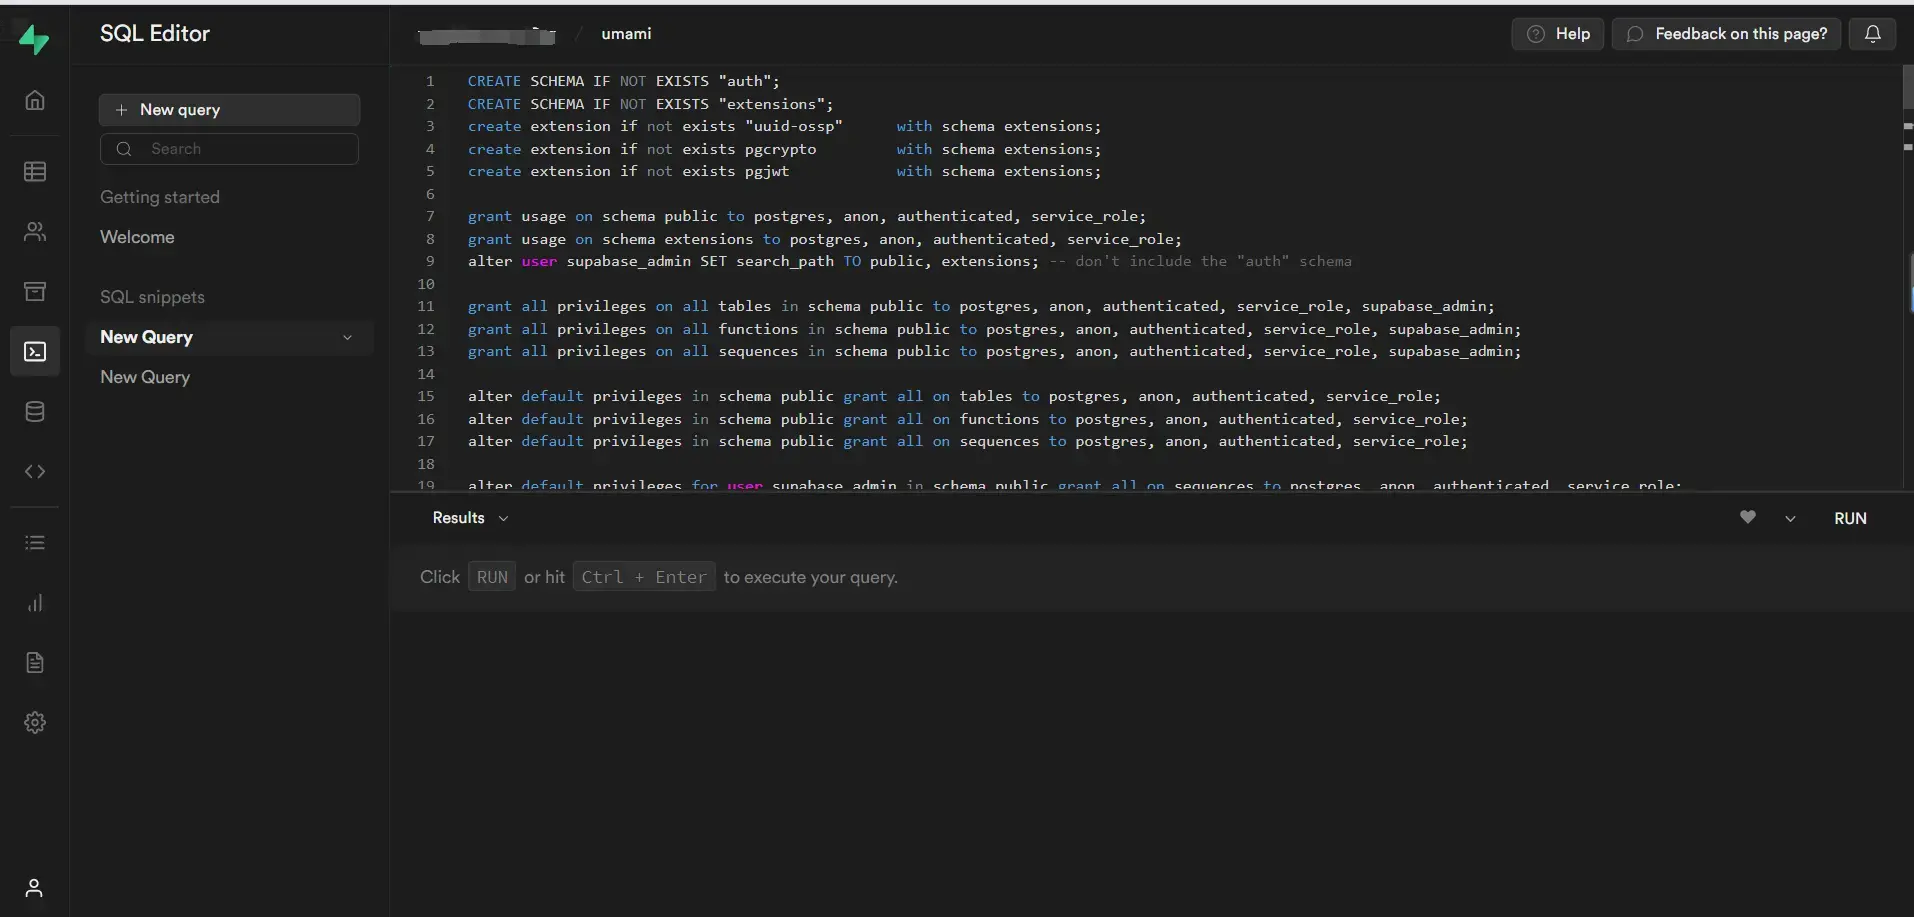
回到主页,我们初始化数据库。进入侧边栏
SQL Editor->New Query,复制以下代码并运行初始化数据库
CREATE SCHEMA IF NOT EXISTS "auth";
CREATE SCHEMA IF NOT EXISTS "extensions";
create extension if not exists "uuid-ossp"      with schema extensions;
create extension if not exists pgcrypto         with schema extensions;
create extension if not exists pgjwt            with schema extensions;

grant usage on schema public to postgres, anon, authenticated, service_role;
grant usage on schema extensions to postgres, anon, authenticated, service_role;
alter user supabase_admin SET search_path TO public, extensions; -- don't include the "auth" schema

grant all privileges on all tables in schema public to postgres, anon, authenticated, service_role, supabase_admin;
grant all privileges on all functions in schema public to postgres, anon, authenticated, service_role, supabase_admin;
grant all privileges on all sequences in schema public to postgres, anon, authenticated, service_role, supabase_admin;

alter default privileges in schema public grant all on tables to postgres, anon, authenticated, service_role;
alter default privileges in schema public grant all on functions to postgres, anon, authenticated, service_role;
alter default privileges in schema public grant all on sequences to postgres, anon, authenticated, service_role;

alter default privileges for user supabase_admin in schema public grant all on sequences to postgres, anon, authenticated, service_role;
alter default privileges for user supabase_admin in schema public grant all on tables to postgres, anon, authenticated, service_role;
alter default privileges for user supabase_admin in schema public grant all on functions to postgres, anon, authenticated, service_role;

alter role anon set statement_timeout = '3s';
alter role authenticated set statement_timeout = '8s';

-- 上面的代码作用是赋予数据库编辑权限,要不然之后部署的时候会报错(血泪的教训惹)

-- CreateTable
CREATE TABLE "account" (
    "user_id" SERIAL NOT NULL,
    "username" VARCHAR(255) NOT NULL,
    "password" VARCHAR(60) NOT NULL,
    "is_admin" BOOLEAN NOT NULL DEFAULT false,
    "created_at" TIMESTAMPTZ(6) DEFAULT CURRENT_TIMESTAMP,
    "updated_at" TIMESTAMPTZ(6) DEFAULT CURRENT_TIMESTAMP,

    PRIMARY KEY ("user_id")
);

-- CreateTable
CREATE TABLE "event" (
    "event_id" SERIAL NOT NULL,
    "website_id" INTEGER NOT NULL,
    "session_id" INTEGER NOT NULL,
    "created_at" TIMESTAMPTZ(6) DEFAULT CURRENT_TIMESTAMP,
    "url" VARCHAR(500) NOT NULL,
    "event_type" VARCHAR(50) NOT NULL,
    "event_value" VARCHAR(50) NOT NULL,

    PRIMARY KEY ("event_id")
);

-- CreateTable
CREATE TABLE "pageview" (
    "view_id" SERIAL NOT NULL,
    "website_id" INTEGER NOT NULL,
    "session_id" INTEGER NOT NULL,
    "created_at" TIMESTAMPTZ(6) DEFAULT CURRENT_TIMESTAMP,
    "url" VARCHAR(500) NOT NULL,
    "referrer" VARCHAR(500),

    PRIMARY KEY ("view_id")
);

-- CreateTable
CREATE TABLE "session" (
    "session_id" SERIAL NOT NULL,
    "session_uuid" UUID NOT NULL,
    "website_id" INTEGER NOT NULL,
    "created_at" TIMESTAMPTZ(6) DEFAULT CURRENT_TIMESTAMP,
    "hostname" VARCHAR(100),
    "browser" VARCHAR(20),
    "os" VARCHAR(20),
    "device" VARCHAR(20),
    "screen" VARCHAR(11),
    "language" VARCHAR(35),
    "country" CHAR(2),

    PRIMARY KEY ("session_id")
);

-- CreateTable
CREATE TABLE "website" (
    "website_id" SERIAL NOT NULL,
    "website_uuid" UUID NOT NULL,
    "user_id" INTEGER NOT NULL,
    "name" VARCHAR(100) NOT NULL,
    "domain" VARCHAR(500),
    "share_id" VARCHAR(64),
    "created_at" TIMESTAMPTZ(6) DEFAULT CURRENT_TIMESTAMP,

    PRIMARY KEY ("website_id")
);

-- CreateIndex
CREATE UNIQUE INDEX "account.username_unique" ON "account"("username");

-- CreateIndex
CREATE INDEX "event_created_at_idx" ON "event"("created_at");

-- CreateIndex
CREATE INDEX "event_session_id_idx" ON "event"("session_id");

-- CreateIndex
CREATE INDEX "event_website_id_idx" ON "event"("website_id");

-- CreateIndex
CREATE INDEX "pageview_created_at_idx" ON "pageview"("created_at");

-- CreateIndex
CREATE INDEX "pageview_session_id_idx" ON "pageview"("session_id");

-- CreateIndex
CREATE INDEX "pageview_website_id_created_at_idx" ON "pageview"("website_id", "created_at");

-- CreateIndex
CREATE INDEX "pageview_website_id_idx" ON "pageview"("website_id");

-- CreateIndex
CREATE INDEX "pageview_website_id_session_id_created_at_idx" ON "pageview"("website_id", "session_id", "created_at");

-- CreateIndex
CREATE UNIQUE INDEX "session.session_uuid_unique" ON "session"("session_uuid");

-- CreateIndex
CREATE INDEX "session_created_at_idx" ON "session"("created_at");

-- CreateIndex
CREATE INDEX "session_website_id_idx" ON "session"("website_id");

-- CreateIndex
CREATE UNIQUE INDEX "website.website_uuid_unique" ON "website"("website_uuid");

-- CreateIndex
CREATE UNIQUE INDEX "website.share_id_unique" ON "website"("share_id");

-- CreateIndex
CREATE INDEX "website_user_id_idx" ON "website"("user_id");

-- AddForeignKey
ALTER TABLE "event" ADD FOREIGN KEY ("session_id") REFERENCES "session"("session_id") ON DELETE CASCADE ON UPDATE CASCADE;

-- AddForeignKey
ALTER TABLE "event" ADD FOREIGN KEY ("website_id") REFERENCES "website"("website_id") ON DELETE CASCADE ON UPDATE CASCADE;

-- AddForeignKey
ALTER TABLE "pageview" ADD FOREIGN KEY ("session_id") REFERENCES "session"("session_id") ON DELETE CASCADE ON UPDATE CASCADE;

-- AddForeignKey
ALTER TABLE "pageview" ADD FOREIGN KEY ("website_id") REFERENCES "website"("website_id") ON DELETE CASCADE ON UPDATE CASCADE;

-- AddForeignKey
ALTER TABLE "session" ADD FOREIGN KEY ("website_id") REFERENCES "website"("website_id") ON DELETE CASCADE ON UPDATE CASCADE;

-- AddForeignKey
ALTER TABLE "website" ADD FOREIGN KEY ("user_id") REFERENCES "account"("user_id") ON DELETE CASCADE ON UPDATE CASCADE;

-- CreateAdminUser
INSERT INTO account (username, password, is_admin) values ('admin', '$2b$10$BUli0c.muyCW1ErNJc3jL.vFRFtFJWrT8/GcR4A.sUdCznaXiqFXa', true);
点
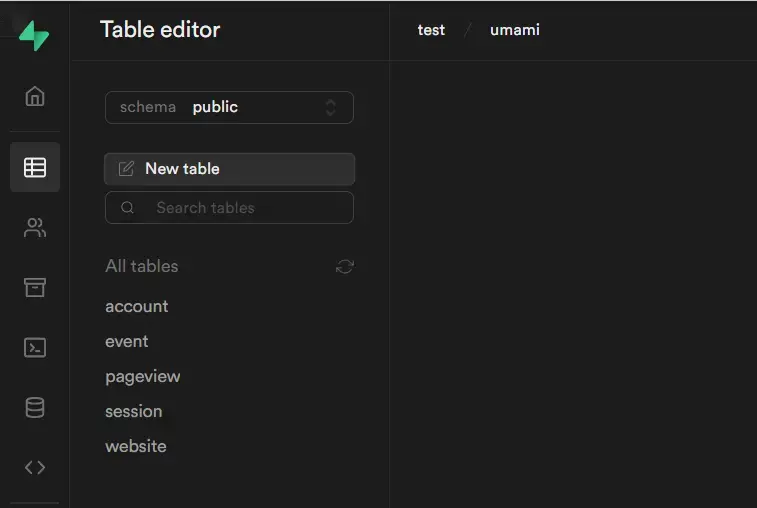
Run后显示Success. No rows returned应该就成了。打开侧边栏Table editor应该可以看到里面多出来了5条数据
Netlify
此时数据库已经初始化完毕,接下来将应用部署在 Netlify 上。
或者手动部署
Fork Umami 的仓库: https://github.com/umami-software/umami 到自己的 GitHub
注册一个 Netlify 帐户并登录(已有跳过)。
从 GitHub 上导入项目。
添加所需的环境变量
DATABASE_URL和HASH_SALT(随机字符串)以及TRACKER_SCRIPT_NAME(DATABASE_URL就是你刚刚编辑过的数据库链接,HASH_SALT随便填,TRACKER_SCRIPT_NAME是指插件脚本名称,由于默认的umami.js容易被浏览器插件屏蔽,故在此自定义脚本名称)避免被插件拦截
使用外挂 JS 的方式来统计数据,虽然可以统计真实的访客记录,但是会被 uBlock 此类的广告拦截插件给直接拦截掉,以至于无法准确的获取访客数据。
这里有大佬已经给出了方案,参考解决 Umami 统计脚本被拦截广告插件拦截 - ROYWANG
点击部署按钮,然后可以访问
<deploy-id>.netlify.app查看效果。后续可以在
Site Settings->Build & Deploy->Environment variables编辑环境变量,需要重新部署服务生效
如何使用
接入网站
配置完成网站后打开,使用初始用户名密码登录 admin:umami。登录完成后可在右上角个人资料,更新密码处修改默认信息。接着个人资料,网站,添加网址处接入待统计的网站,如果勾选了启用共享链接,代表可以将该网站的统计数据分享给他人查看。
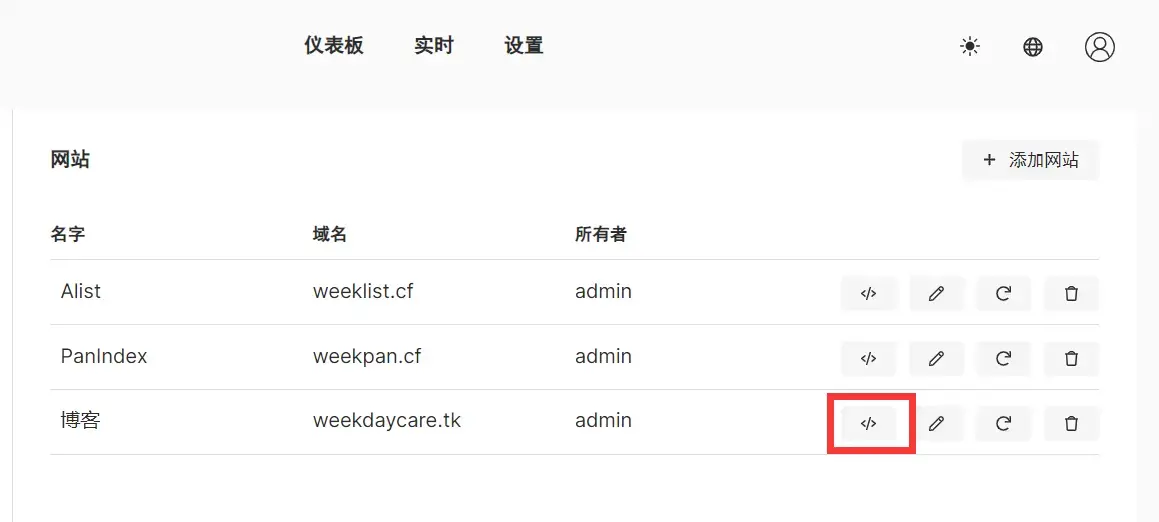
添加网站后,在网站列表的获取跟踪代码按钮处点击,复制具体内容到标签中,注:如果开启了自定义脚本名称,此处的链接文件需要手动替换。
跟踪事件
Umami 的自定义跟踪事件有些鸡肋,只能做到统计数量。支持两类:一是 CSS 类,也就是
umami--<event>--<event-name>打标方式;另一种是在加载完成 Umami 文件后,提供了 umami 对象,可以调用一些方法,两种方式其实都挺勉强。
详情见官网文档:https://umami.is/docs/track-events
在 hexo 中使用
如果主题没有适配 umami 或者你的主题不支持插入能够传入参数的js脚本,可以使用 hexo injector 直接注入,hexo 版本需要大于 5
在你的网站根目录下的 Scripts 文件夹下(愣着干嘛,没有新建啊),新建一个 umami.js 文件,复制以下代码进去保存即可。
自行替换掉其中的 <your-website-id> 与 <your-umami-url> ,你可以在umami控制台设置中添加网站找到两段代码
hexo.extend.injector.register('head_end', '<script async defer data-website-id="<your-website-id>" src="<your-umami-url>"></script>'); |
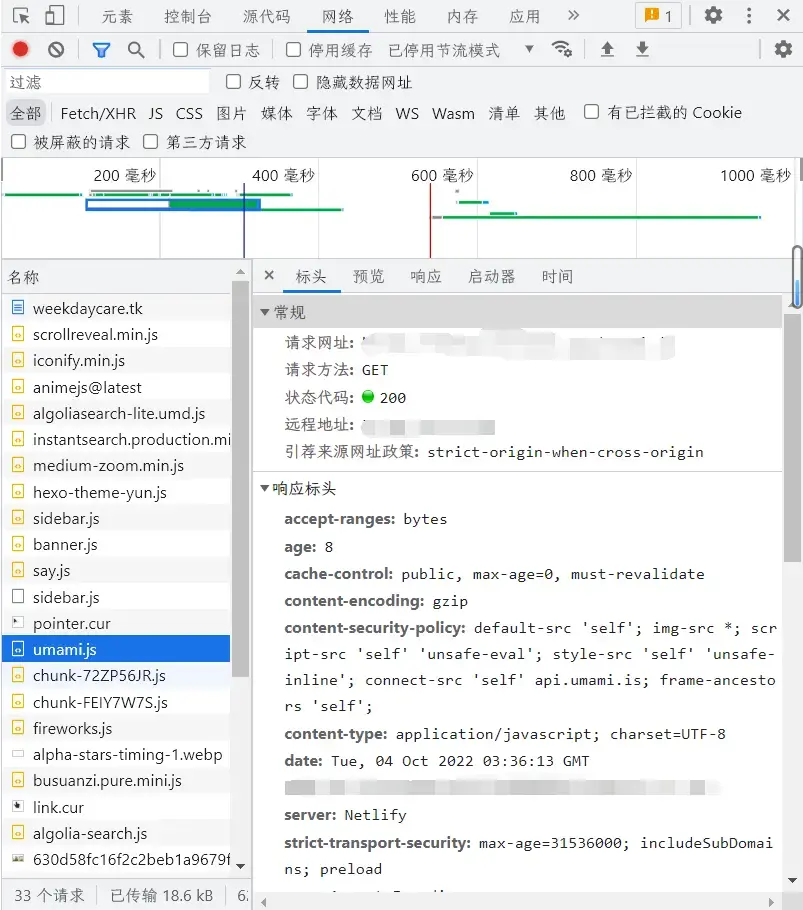
再次 hexo g & hexo d 重现打开你的网站,F12打开控制台,出现 <TRACKER_SCRIPT_NAME>.js 即为引用成功
浏览器屏蔽掉js脚本(推荐)
这一步是可选的,不过我十分建议你这样做。因为Hexo自身的特性,我们在编写完文章后并不能直接预览,必须由hexo渲染出html页面才能在本地预览。这就导致了你在预览你的页面的时候umami的脚本一样会自动加载,意思就是你自己预览自己的页面也会被计入统计,这就有点麻烦,因为umami是没有域名过滤的功能的,所以你分不清哪些是外来访客哪些是你自己预览的,十分的不方便&不直观。
两种方法:
使用浏览器
Fn+12,记录网络活动,找到js脚本右键拦截域使用浏览器广告屏蔽插件,如
uBlockAdBlock (plus)AdGuard等,我自己用的是uBlock,所以以它来举例。
进入后台详细设置,点击自定义静态规则,在下方的编辑框中加入以下代码,自行替换其中<your-doamin>&<your-js-name>||<your-domain>/<your-js-name>.js$script
测试完不要忘记去刷新一下页面看又没有生效
一些题外话
为啥我不用Vercel?
其实并不是没有尝试过使用vercel,只是不知道为啥vercel部署完成后登录的时候login会报Error 500的错误,然后卡在登陆界面没有反应,没弄清楚,Netlify就没有问题
为什么Supabase不用Connection info里面的链接呢?
因为等会儿部署的时候它会报错连不上Datebase,不要参考官方文档中的标准链接,不过貌似在我写这篇文章的时候好像官方文档已经改过来了 umami - Running on Supabase
为什么你的初始化数据库代码与官方的不一样?
因为会报Error: P3018(issue里面好像说是没有读写权限?)
[01:50:57.036] Running "vercel build" |
可以参考一下issue:
https://github.com/umami-software/umami/issues/1525
https://github.com/umami-software/umami/discussions/1486#discussioncomment-3567397
还有其他的数据库可以部署吗?
当然有,比如PlanetScale,只是不知道为啥同样也是一直报错,没搞懂,读者可以自行摸索
